The Science of Student Engagement: What I Learned After 23 Years in the Classroom
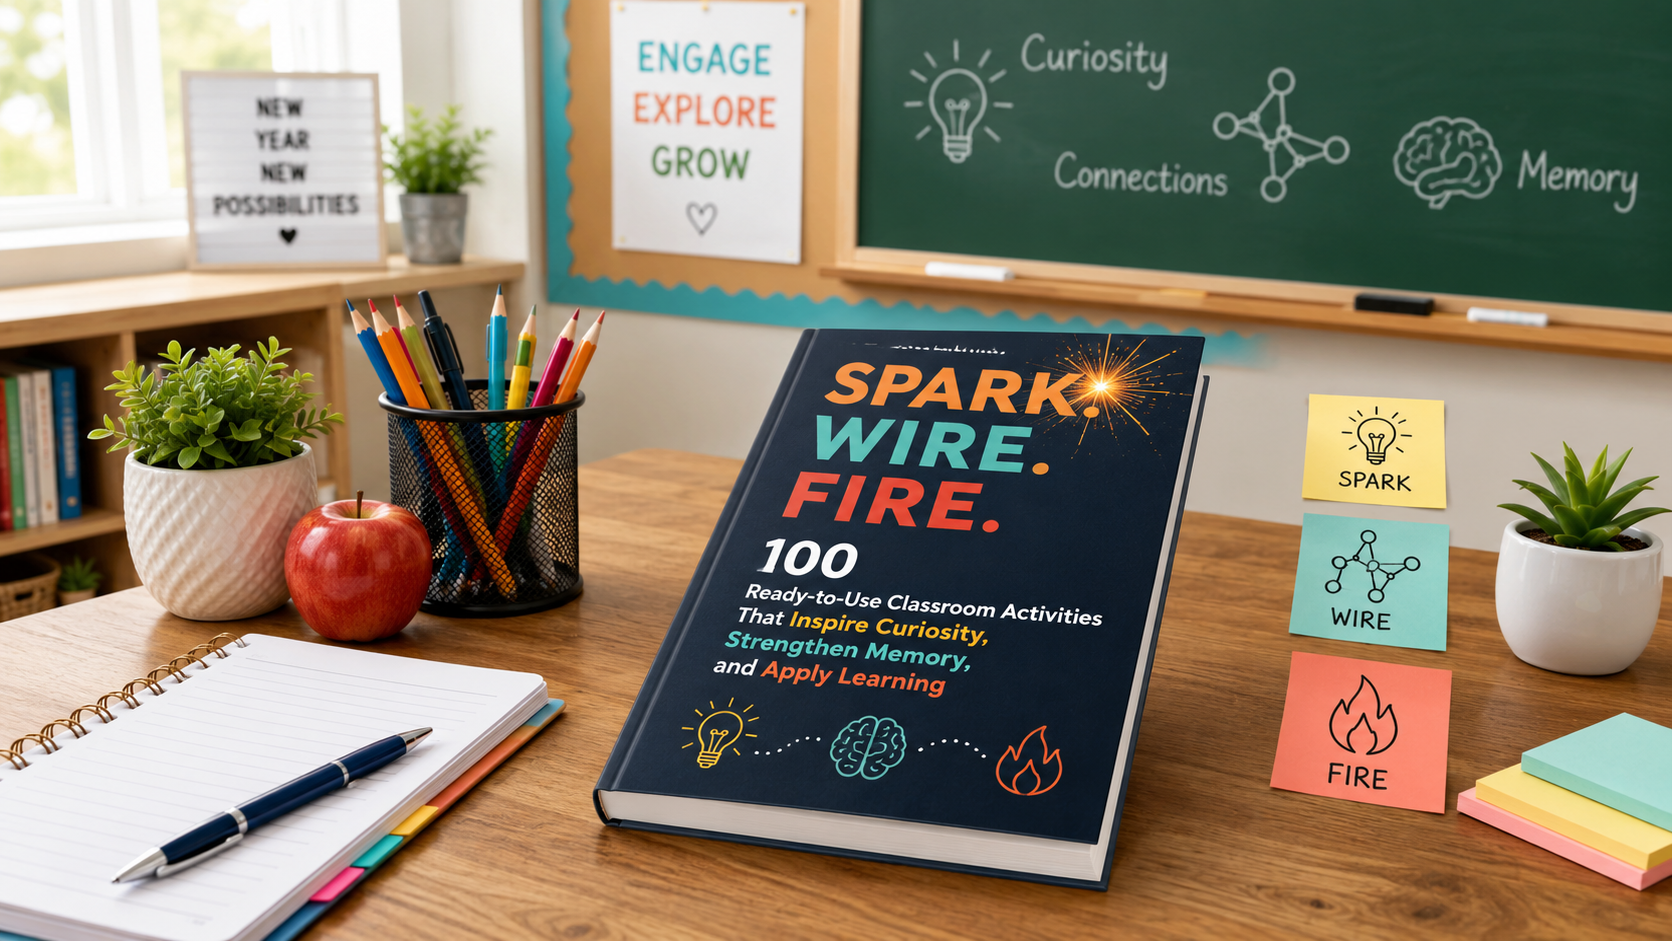
A new school year begins with curiosity, connection, and attention. This simple classroom workspace graphic reflects the core ideas behind Spark. Wire. Fire. and the science of student engagement.
I didn’t start teaching with a deep understanding of cognitive science, or… teaching for that matter.
I started like most teachers start: with content to cover, lessons to plan, students to manage, and the daily hope that what I was doing would actually make a difference. I knew my subject. I cared about students. I worked hard.
But understanding how students actually learn? That took a lot longer.
Before I became a teacher, I was a student in Poland. I remember that school was mostly about listening, copying, memorizing, and surviving the system.
Later, as a student in the United States, I saw school from a different angle, but still noticed the same basic problem: students can be physically present without being mentally there.
Then I survived college and accidentally became a teacher.
I started in Chicago Public Schools, where I quickly learned that teaching environmental science was not just about knowing the content. It was about getting students to care enough, focus enough, and think enough to actually learn it. That part was harder than I expected. A great lesson plan did not always turn into great learning.
Then, I taught chemistry for a long time. I loved the subject. Still do. But even with reactions, labs, color changes, fire, and all the “cool science” stuff, I still watched students disengage. Not all. Not every day. But enough to notice.
There were blank stares, notes copied but not understood, review days where students acted like we had never discussed the topic before—all moments that helped me realize explaining something clearly did not equal learning deeply.
Later, when I moved into Earth and Space Science, I saw the same thing again. Different content. Different grade level. Same brain problem. Students needed more than information. They needed a reason to pay attention, a way to connect new ideas to what they already knew, and repeated chances to retrieve, explain, and use what they were learning.
That realization changed how I think about teaching.
Before, I thought student engagement was mostly about making lessons more interesting. Add a better demo. Find a cooler video. Tell a funnier story. Bring more energy. But eventually I realized that entertainment is not engagement.
Real engagement is cognitive.
Students are truly engaged when they are predicting, retrieving, explaining, connecting, debating, drawing, sorting, moving, questioning, and applying ideas. In other words, students are engaged when their brains are doing something meaningful with the learning.
That is where cognitive science started to change my teaching. I began paying more attention to how learning actually works: attention, memory, cognitive load, retrieval, prior knowledge, curiosity, movement, discussion, and application. Suddenly, a lot of classroom problems started making more sense.
Students were not always bored because they were lazy. Sometimes the lesson was too predictable. Sometimes they had no prior knowledge to connect the new idea to. Sometimes working memory was overloaded. Sometimes they recognized information but could not retrieve it. And sometimes they were compliant, but not actually thinking.
That last one hit me hard.
I realized that just as a busy, quiet classroom is not always a classroom where learning is occuring, a completed worksheet is not always evidence of learning.
I started grasping that learning happens when students do something more meaningful with information.
That is why I became interested in short, practical, brain-based classroom activities. Not complicated programs or activities that require three hours of prep and a laminator, but small, high-impact teaching moves that help students enter the learning, strengthen memory, and apply what they know.
A wrong answer students have to fix.
A mystery object they have to explain.
A quick drawing that reveals understanding.
A partner teaching activity that forces them to organize their thinking.
A retrieval challenge that makes them pull information from memory.
A debate that makes them defend an idea.
A “what if?” question that pushes them beyond memorization.
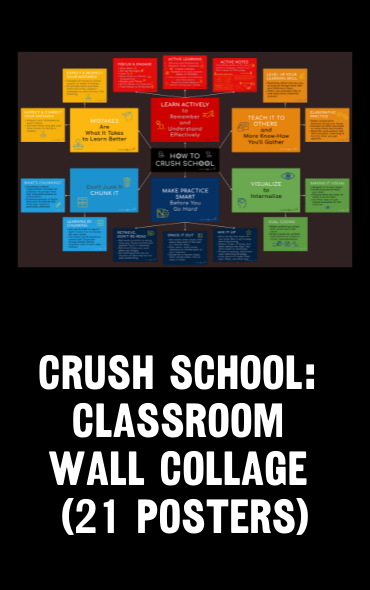
Over time, I started seeing these activities in three categories. Some activities spark curiosity and attention. Some activities wire learning into memory. Some activities fire learning into application. Yes, they often overlap and no, it is not that simple, but doing so helped me organize my students learning and my teaching in a simple way.
That became the Spark. Wire. Fire. framework.
And that is why I wrote Spark. Wire. Fire.: 100 Ready-to-Use Classroom Activities That Inspire Curiosity, Strengthen Memory, and Apply Learning.
I wrote it because teachers are busy and students are distracted.
I wrote it because attention is harder to earn than ever and because we need learning that works, not just activities that fill time.
Most importantly, I wrote it because I wish I had understood earlier that student engagement is not a bonus teachers get after we do “real teaching.” Rather, it is how real teaching and true learning begins.
After 23 years in the classroom, I am more convinced than ever that students learn best when teachers do less and students do more.
They need to think, talk, retrieve, connect, move, explain, create, and apply not after we “teach them” the content, but to actually learn it.
They need classrooms where learning is not something that happens to them, but something they do.
That is the science of student engagement.
And that is the heart of Spark. Wire. Fire.
BOOKS & TOOLS
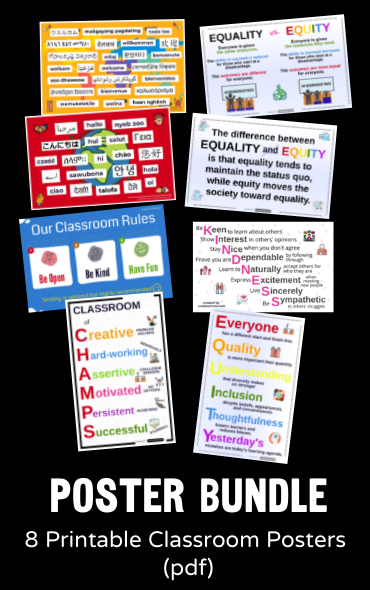
8 digital, printable, size 11 x 17 classroom posters:
“Welcome” in multiple languages
“Hi” in multiple languages
Three Equity posters
Classroom Rules: Be Open, Be Kind, Have Fun
“Classroom of Champs”
“Kindness”
ON SALE until August 30th.

Equity-Promoting Classroom Poster. What does EQUITY in the classroom look like?
Everyone has a different start and finish line
Quality is more important that quantity
Understanding that diversity makes us stronger
Inclusion despite beliefs, appearances, and circumstances
Thoughtfulness lowers barriers and reduces biases
Yesterday's mistakes are today's learning agenda
You can teach your students about equity and make it a daily classroom practice using this inspirational poster, which also includes images that accompany the equity description. You can discuss each letter characteristic with your students as a way of introducing your inclusive classroom and display it prominently as a reminder that diversity makes the classroom community stronger.

In this classroom Mistakes are Expected, Respected, Inspected, Corrected!
Learned helplessness is a result of years of conditioning that mistakes are bad for learning. Nothing is further from the truth - some of the most powerful life lessons come from making mistakes, reflecting on them, and growing as a result.
This is a PNG Poster you can print and display in your classroom to encourage a culture of risk-taking and learning from mistakes.

NEW BOOK
100+ practical activities teachers can use right away with little or no prep.
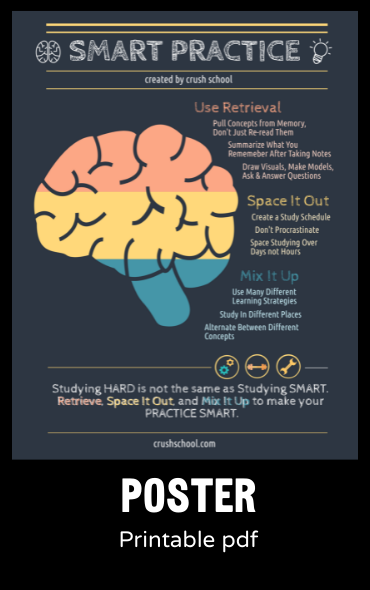
Retrieval Practice, Spaced Practice, and Mixed Practice (Interleaving).
Studying Hard is not the same as Studying Smart. This High Quality printable, digital (PNG) poster is a constant classroom reminder of best practices for teachers and learning the smart way for students.
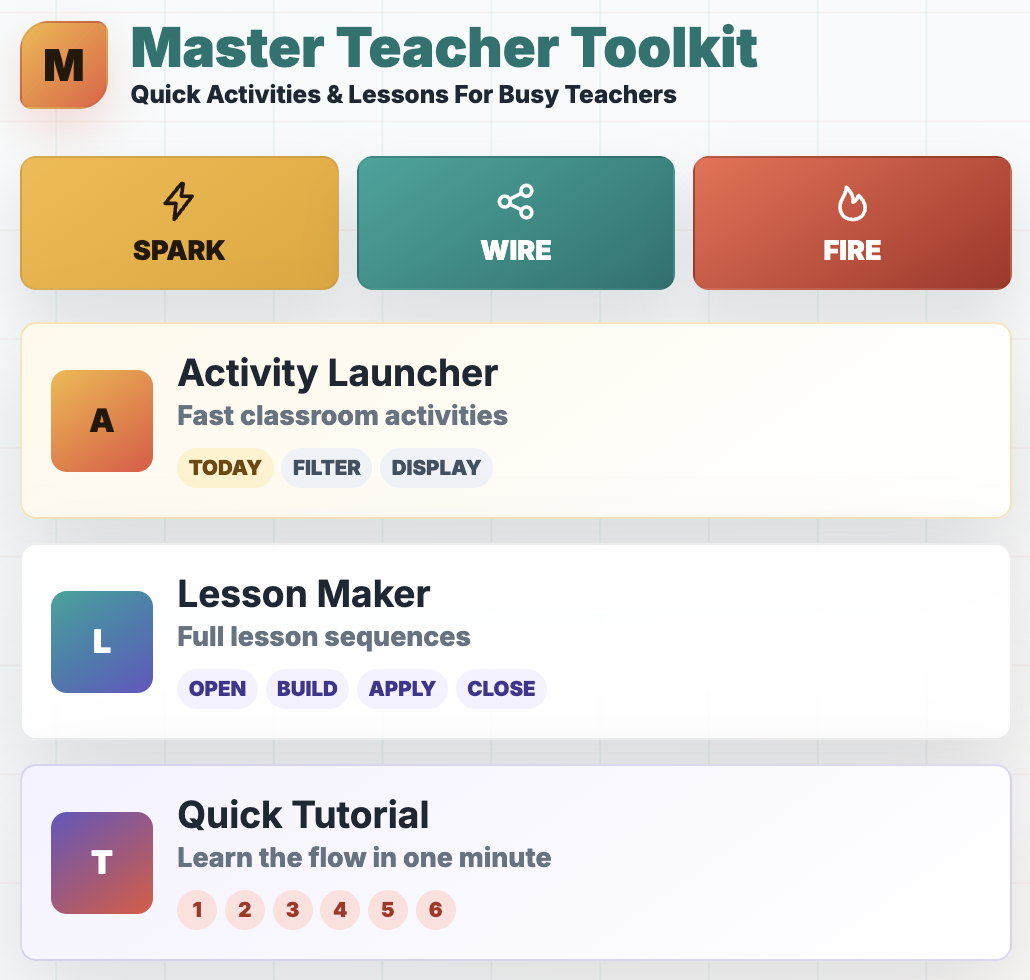
Teaching App
Build better activities and lessons in seconds. Then launch and display them to students instantly.